User Analytics
⚡ 3 min readTrack user activity with visual charts and manage users with add/delete operations.
What the User Analytics Panel Does
The User Analytics panel provides a modal dashboard with two tabs:
- Overview Tab - Visual charts showing user activity trends (Active Users, New Registrations, Total Users)
- Users Tab - User management table with add/delete capabilities
Unlike other panels, User Analytics opens as a floating modal window in the center of the screen, not in the side panel.
Prerequisites
- Active Transcodes project with registered users
Opening the User Analytics Panel
- Log in to Transcodes Console
- Open your project
- Locate the Authentication Kit Cluster
- Click the chart icon (📊) labeled “User Analytics”
- The Analytics Dashboard modal opens in the center
Overview Tab
The Overview tab displays user activity analytics with date range filtering and three charts.
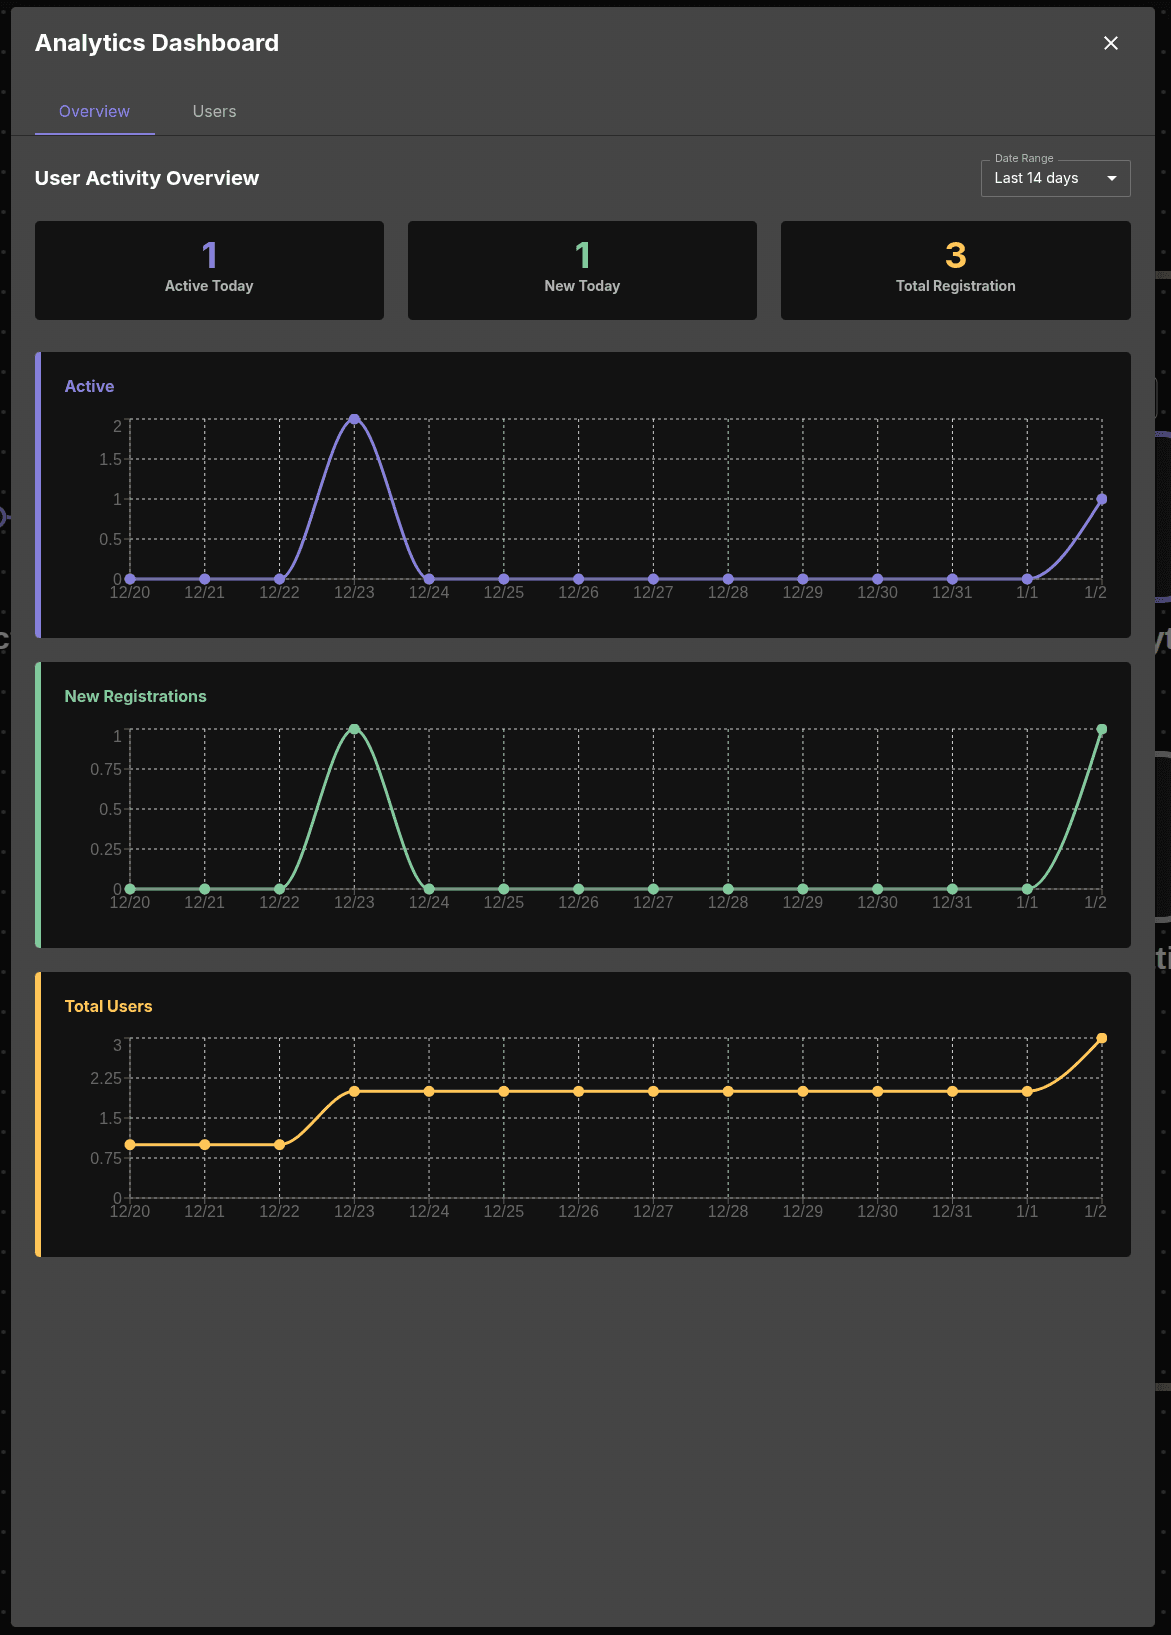
The Overview tab shows:
- Date Range dropdown: Last 14 days (default), 7/30/90 days options
- User Activity Overview section with 3 summary cards:
- Active Today
- New Today
- Total Registration
- 3 Line Charts:
- Active (purple) - Daily active users
- New Registrations (green) - New user signups per day
- Total Users (orange) - Cumulative user count
Select Date Range
To change the date range:
- Locate the Date Range dropdown (top-right)
- Select one of the available options:
- 7 Days - Last week
- 14 Days - Last two weeks (default)
- 30 Days - Last month
- 90 Days - Last quarter
- Charts update automatically
Users Tab
The Users tab displays a table of registered users with add/delete capabilities.
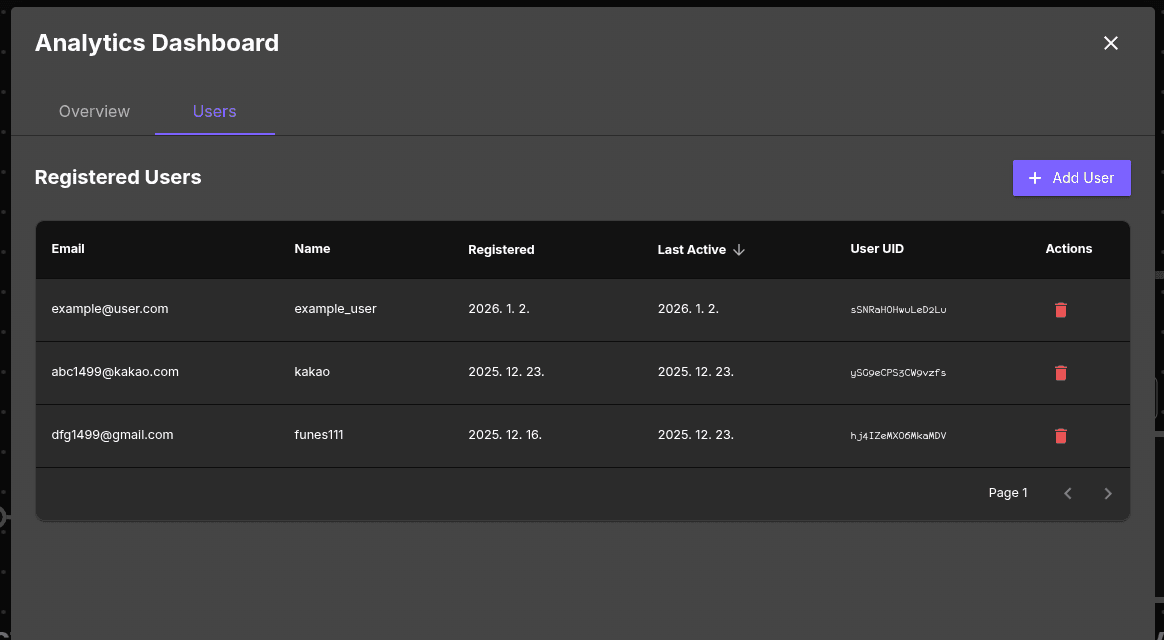
The Users tab shows:
- Registered Users section
- + Add User button (top-right)
- User table with columns:
- Name
- Registered
- Last Active (sortable with ↓)
- User UID
- Actions (delete icon)
- Pagination controls (Page 1, < >)
Add User
To add a new user:
- Click the + Add User button
- The Add New User modal appears
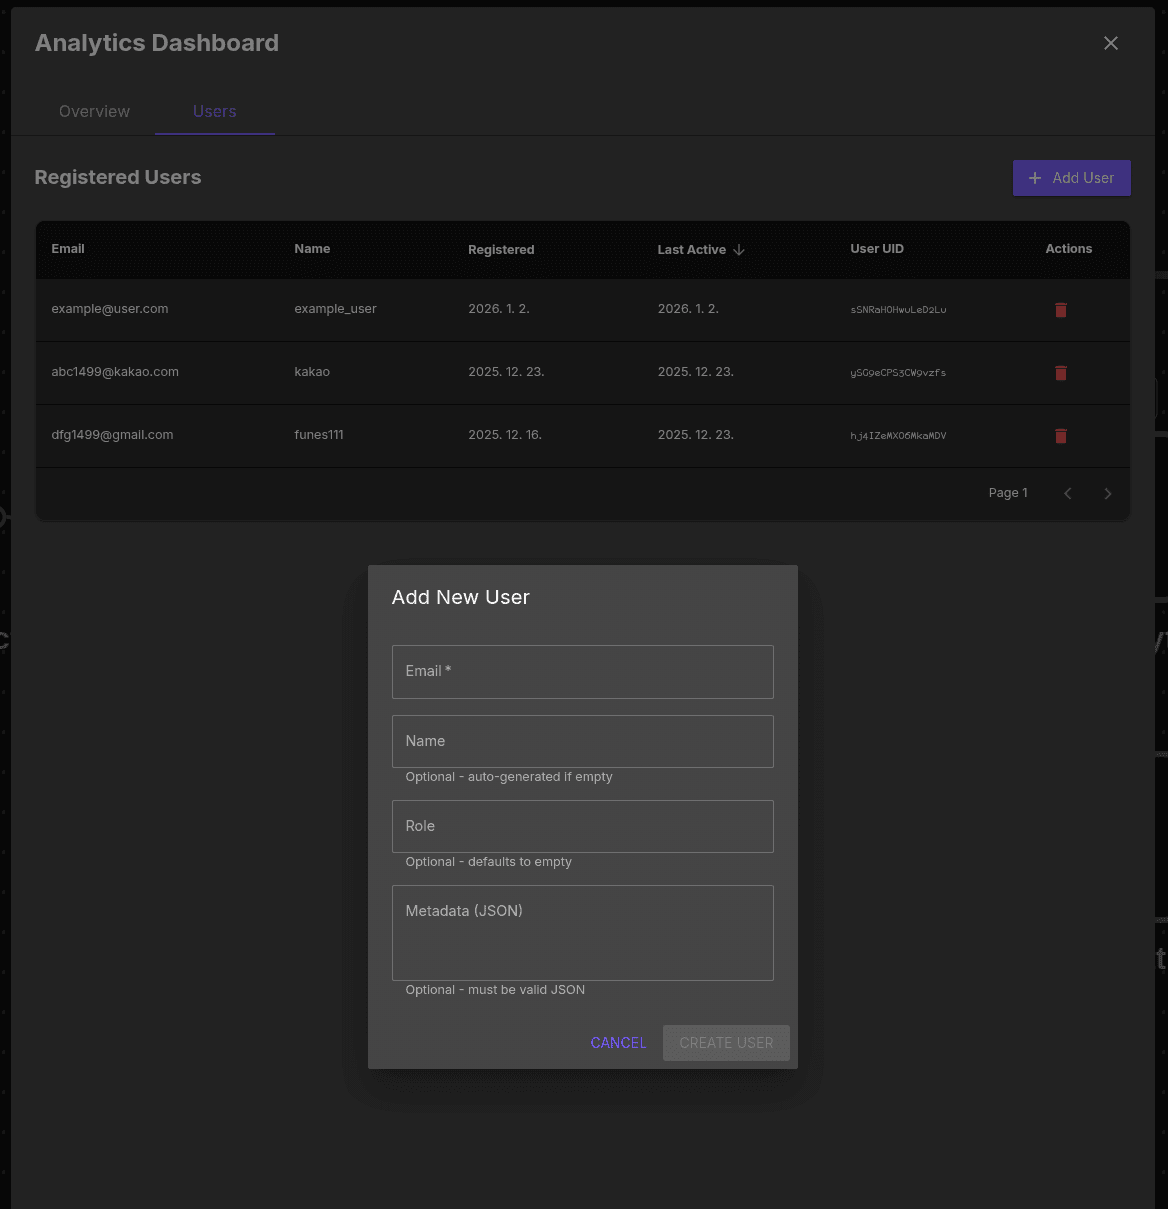
- Fill in the form fields:
| Field | Required | Description |
|---|---|---|
| Yes | User’s email address | |
| Name | No | Display name (auto-generated if empty) |
| Role | No | User role (defaults to empty) |
| Metadata (JSON) | No | Custom metadata in valid JSON format |
- Click CREATE USER
- The user appears in the table immediately
Metadata Validation: The Metadata field must be valid JSON. Invalid JSON will prevent form submission.
Example metadata:
{
  "department": "sales",
  "plan": "pro"
}
Delete User
To delete a user:
- Find the user in the table
- Click the trash icon (🗑️) in the Actions column
- The Delete User confirmation modal appears
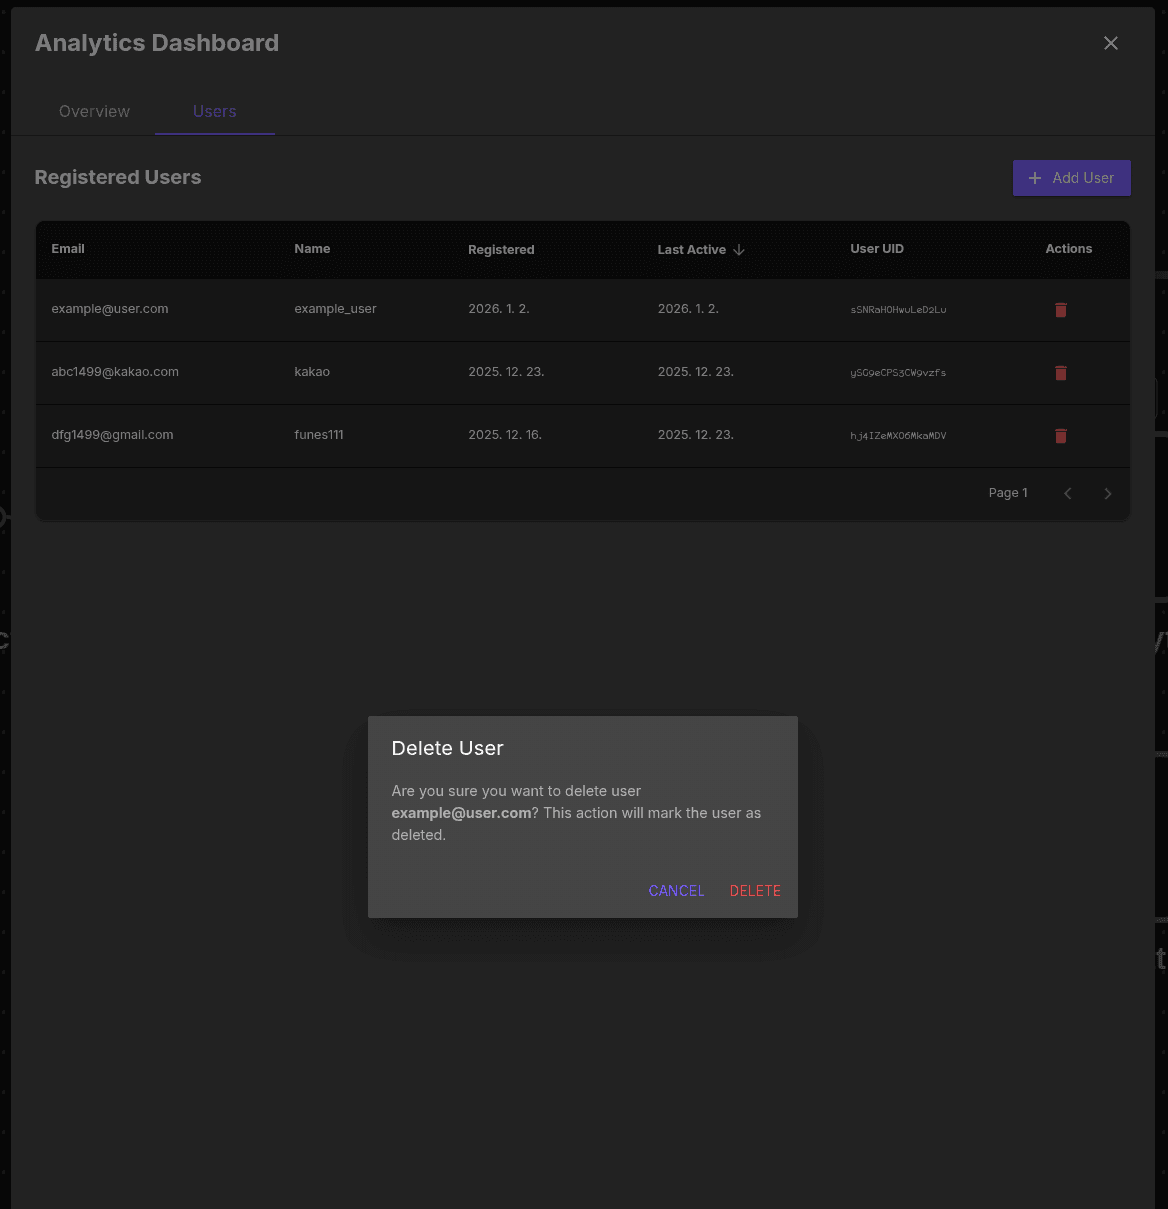
- Review the confirmation message
- Click DELETE to confirm (or CANCEL to abort)
- The user is marked as deleted immediately
Warning: This action will mark the user as deleted. The user’s authentication credentials will be removed.
Sort Users
To sort the user table:
- Click the Last Active column header (↓)
- The table sorts by last activity date
- Click again to reverse the sort order
What to do next?
After reviewing user analytics:
- Download user data backups
- Configure token expiration based on usage patterns
- Customize authentication UI