Branding
⚡ 3 min readCustomize your authentication UI with logo, colors, title, and slogan to match your brand identity.
What the Branding Panel Does
Customize your authentication UI with logo, colors, title, and slogan to match your brand identity on authentication pages.
Panel features:
- Upload logo (SVG format only, max 2MB)
- Set title and slogan
- Customize colors (background, primary, primary hover)
Changes are reflected immediately in authentication modals shown to your users.
Prerequisites
- SVG logo file (max 2MB)
- Brand color codes (HEX format)
Opening the Branding Panel
- Log in to Transcodes Console
- Open your project
- Locate the Authentication Kit Cluster
- Click the sparkles icon (✨) labeled “Branding”
- The panel opens on the right side
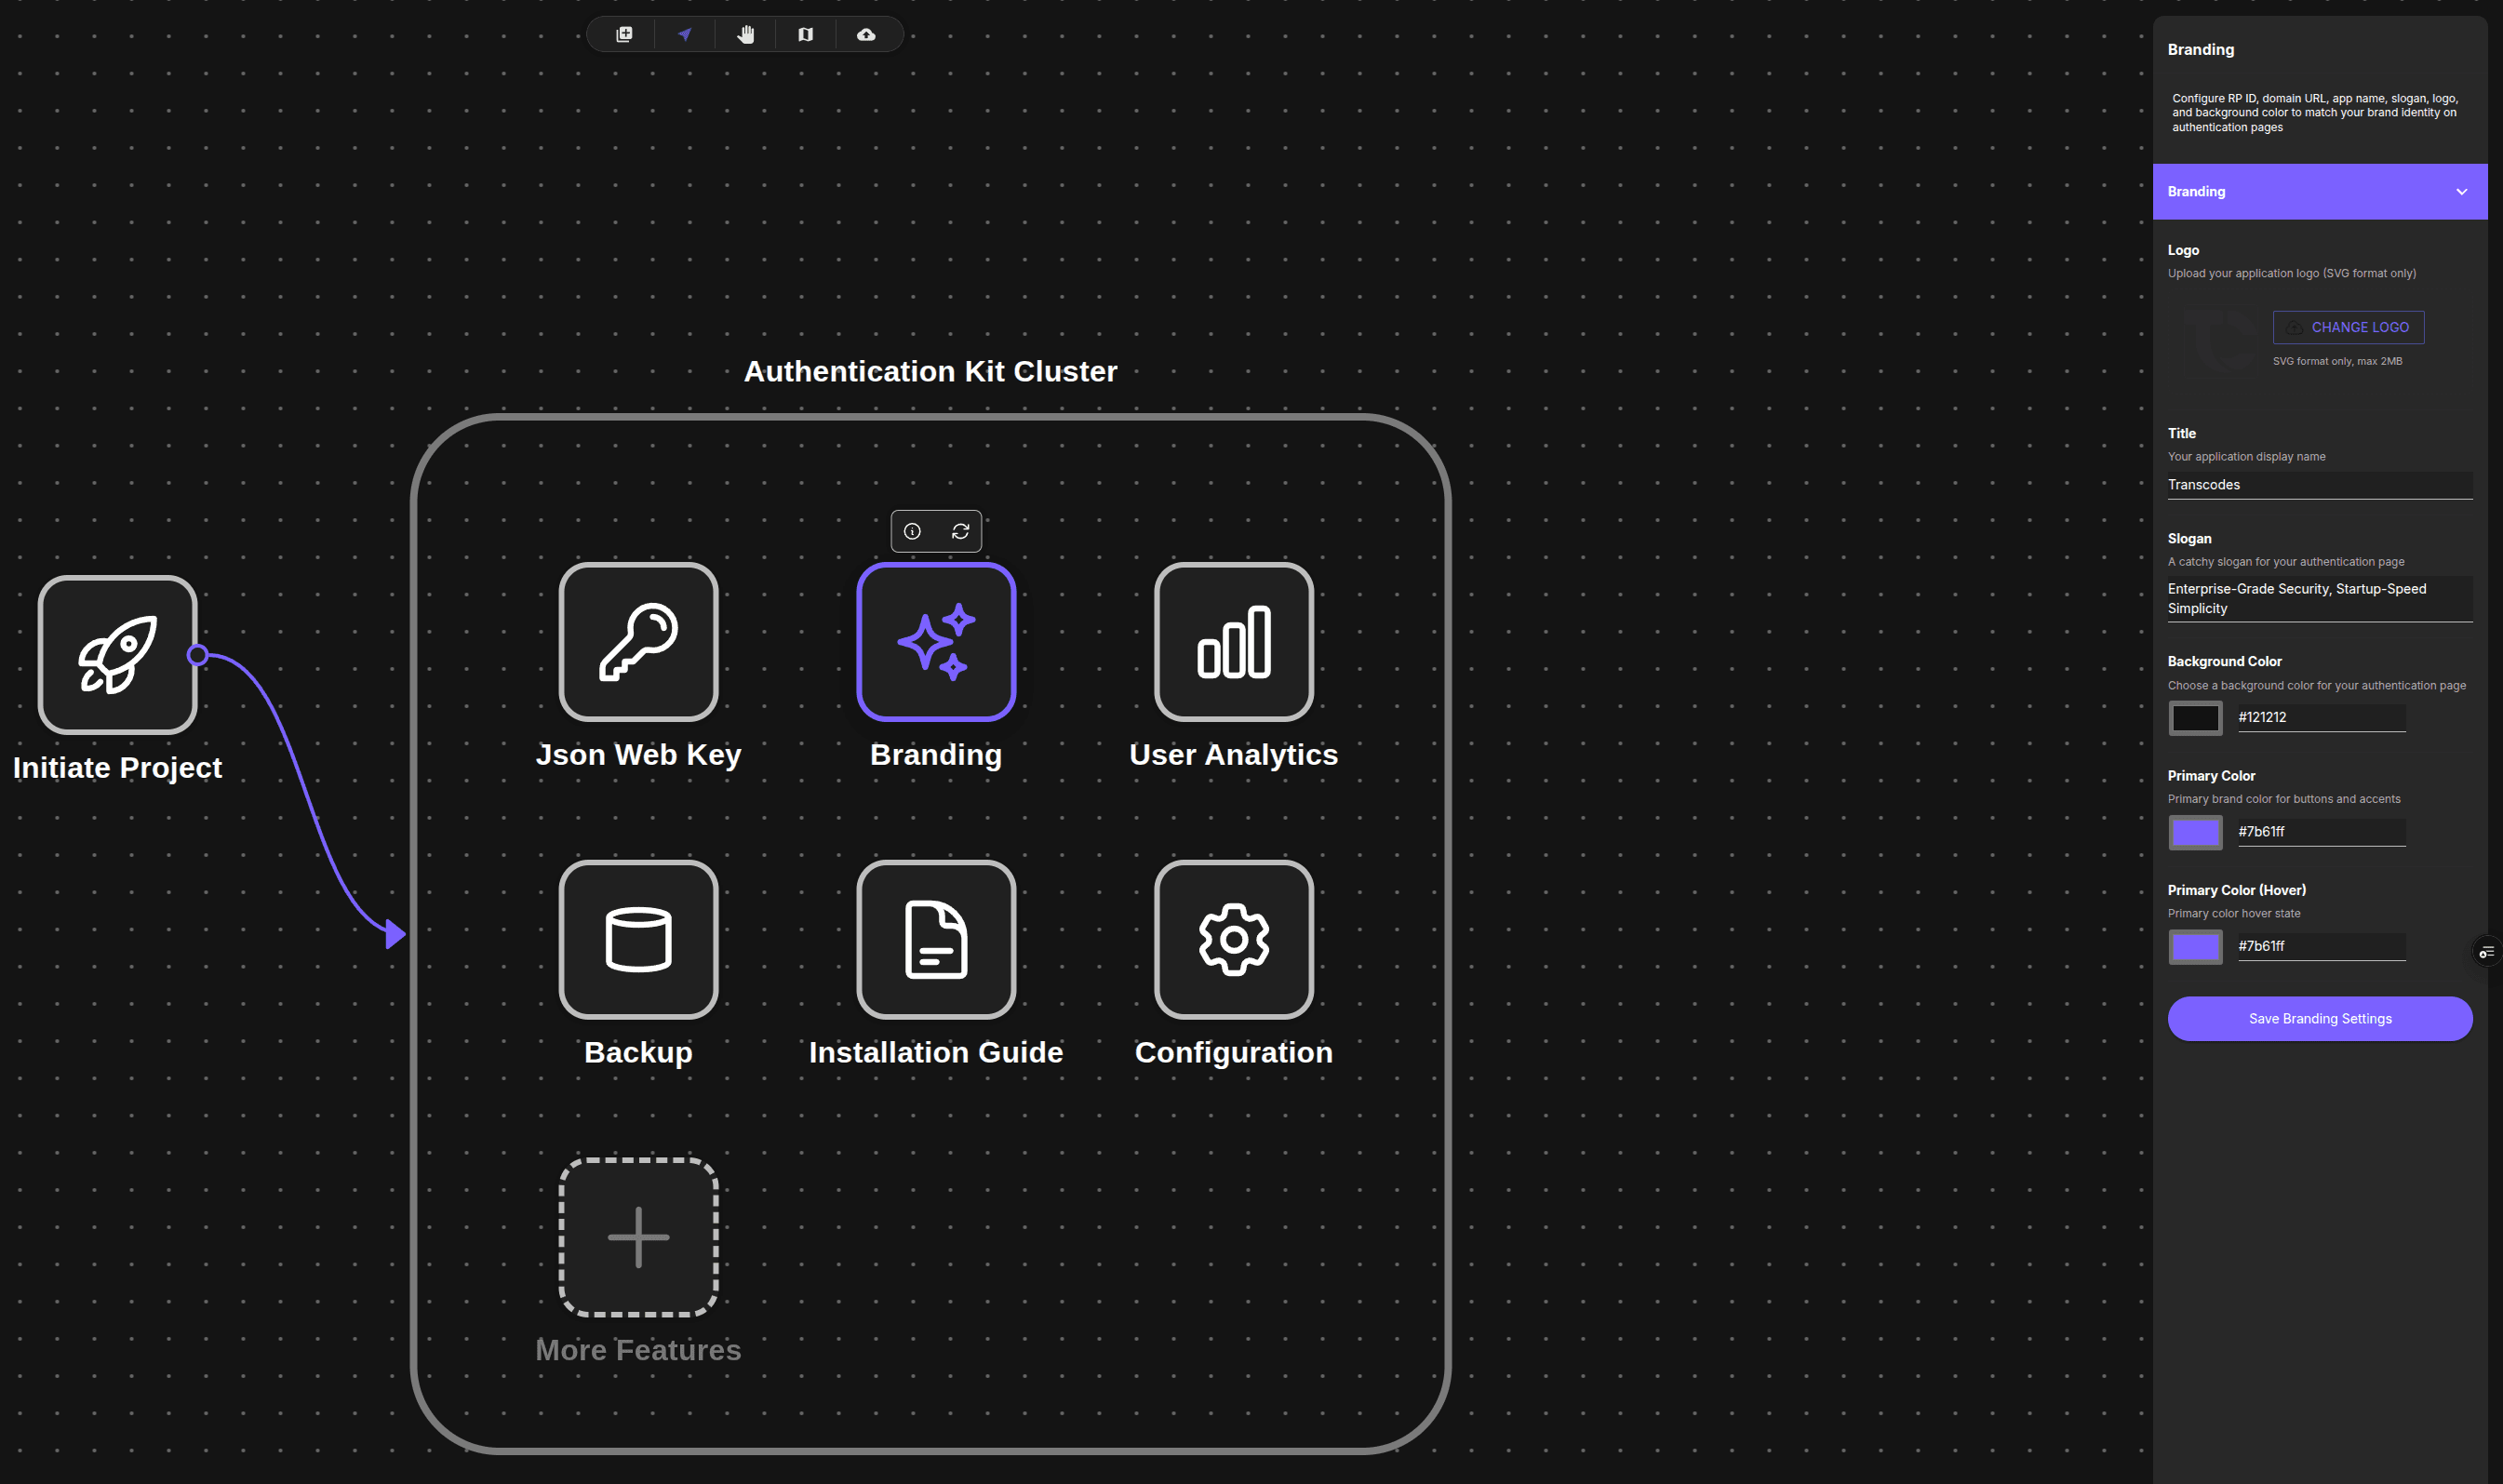
The Branding panel appears on the right with a purple “Branding” accordion section.
Customizing Your Brand
The Branding panel contains fields for customizing your authentication page appearance.
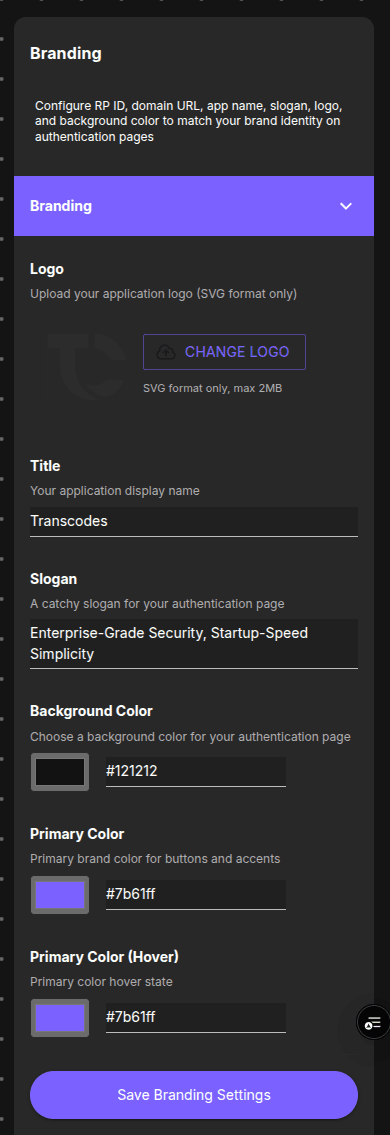
The panel shows:
- Logo: Upload button, “SVG format only, max 2MB”
- Title: “Your application display name” (example: “Transcodes”)
- Slogan: “A catchy slogan for your authentication page” (example: “Enterprise-Grade Security, Startup-Speed Simplicity”)
- Background Color: Color picker with HEX value (example: “#121212”)
- Primary Color: Color picker with HEX value (example: “#7b61ff”)
- Primary Color (Hover): Color picker with HEX value (example: “#7b61ff”)
- Save Branding Settings button
1. Upload Logo
To upload your logo:
- Click the CHANGE LOGO button
- Select an SVG file from your computer (max 2MB)
- The logo appears immediately in the preview
SVG Only: Only SVG files are accepted. Convert PNG/JPG logos to SVG using tools like Adobe Illustrator, Inkscape, or online converters.
2. Set Title
To set title:
- Locate the Title text field
- Enter your application name
- Example: “Transcodes” or “MyApp”
3. Set Slogan
To set slogan:
- Locate the Slogan text field
- Enter your tagline
- Example: “Enterprise-Grade Security, Startup-Speed Simplicity”
4. Choose Background Color
To set background color:
- Locate the Background Color section
- Click the color picker or enter a HEX code
- Example:
#121212(dark) or#ffffff(white)
5. Choose Primary Color
To set primary color:
- Locate the Primary Color section
- Click the color picker or enter a HEX code
- Example:
#7b61ff(purple)
6. Choose Primary Hover Color
To set hover color:
- Locate the Primary Color Hover section
- Click the color picker or enter a HEX code
- Example:
#0056b3(15-20% darker than primary)
7. Save Changes
To save:
- Click Save Branding Settings button at the bottom
- Wait for confirmation message
- Changes take effect immediately
Unsaved Changes: Always save before leaving the panel. Changes are lost if you navigate away without saving.
What to do next?
After customizing your branding:
- Track user engagement with your branded auth experience
- Configure RP ID and service URLs
- Follow Integration Guide to implement authentication
- Ensure secure implementation