Configuration
⚡ 3 min readConfigure authentication settings including RP ID, access token expiration, and legal URLs.
What the Configuration Panel Does
The Configuration panel manages core authentication settings with several key components:
- Domain authentication (RP ID) - Required for WebAuthn passkey functionality
- Token lifetime - Access token expiration periods (1 hour to 1 year)
- Legal compliance - Terms of Service and Privacy Policy URLs for authentication modals
Panel description:
Located in the top-right section, the panel shows: “Manage your project with general settings, appearance customization, notification controls, privacy settings, and advanced options.”
Critical: Incorrect RP ID configuration will prevent WebAuthn from working. This setting must match your application’s domain exactly.
Prerequisites
- Your application’s domain name (e.g.,
example.comorlocalhostfor development) - (Optional) URLs for Terms of Service and Privacy Policy documents
Opening the Configuration Panel
- Log in to Transcodes Console
- Open your project
- Locate the Authentication Kit Cluster
- Click the gear icon (⚙️) labeled “Configuration”
- The panel opens on the right side
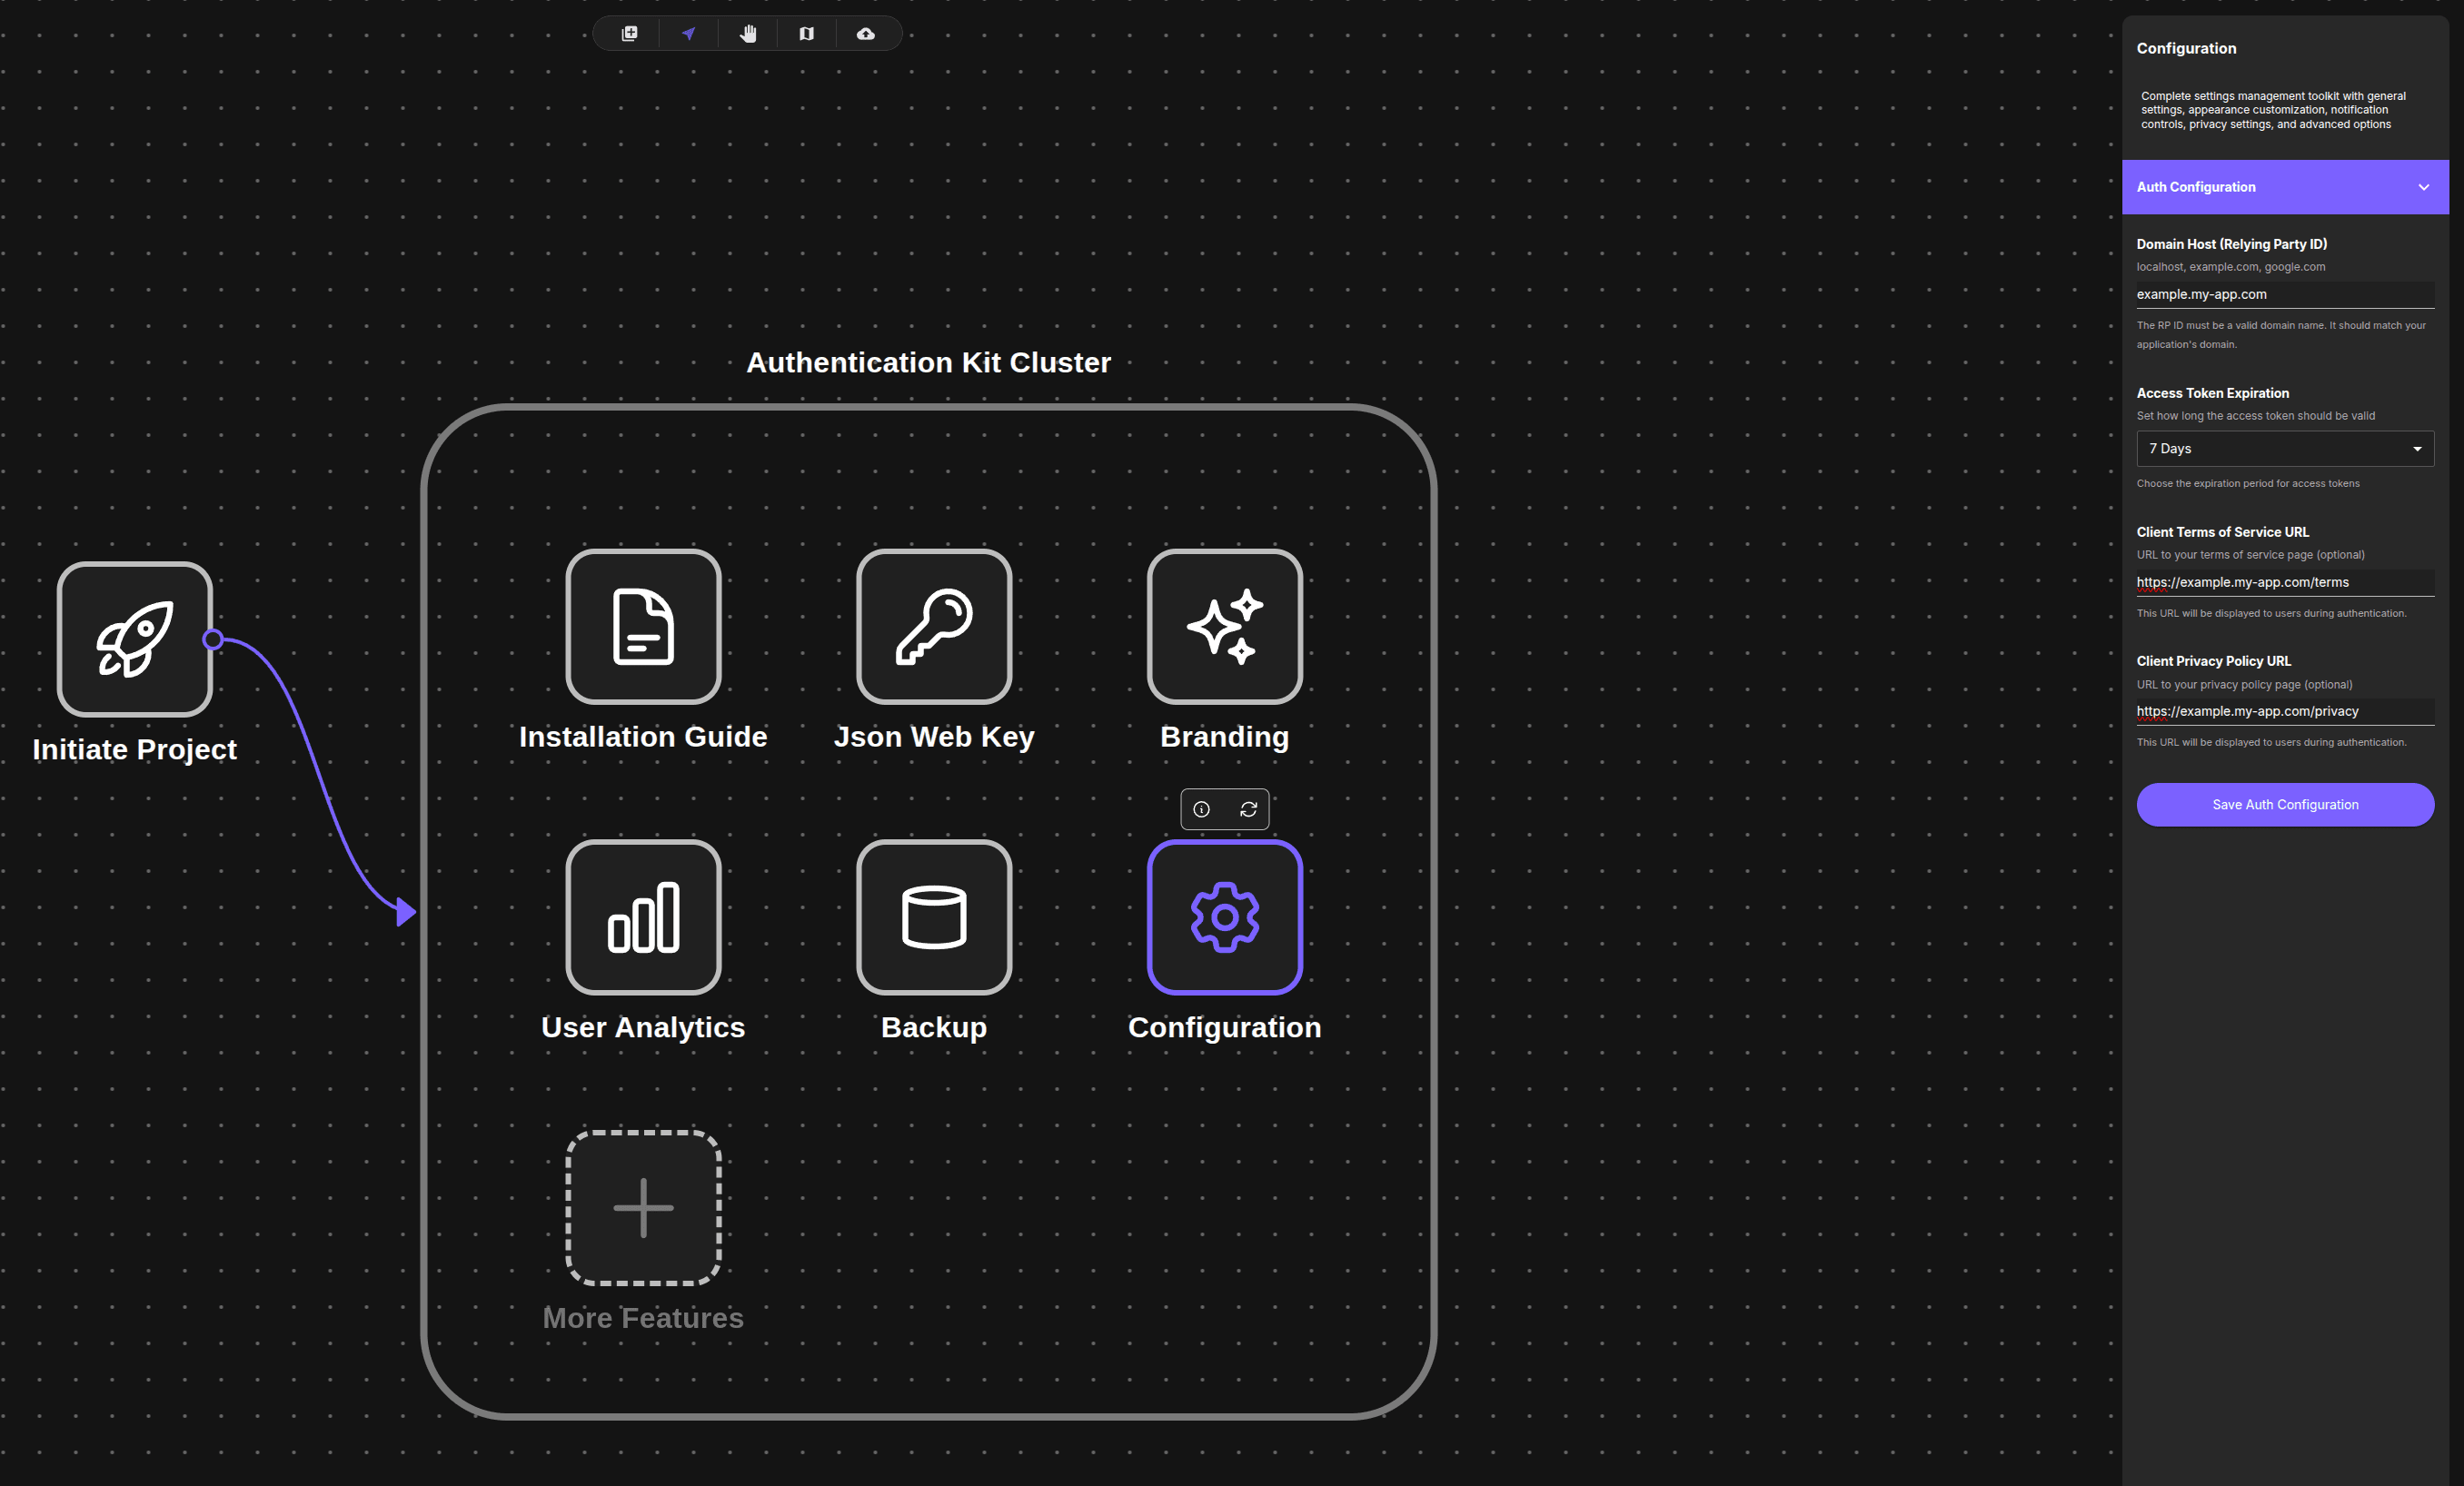
The Configuration panel appears on the right with a purple “Auth Configuration” accordion section.
Configuring Settings
The Configuration panel contains an accordion section titled “Auth Configuration” with four fields.
Example configuration shown in the panel:
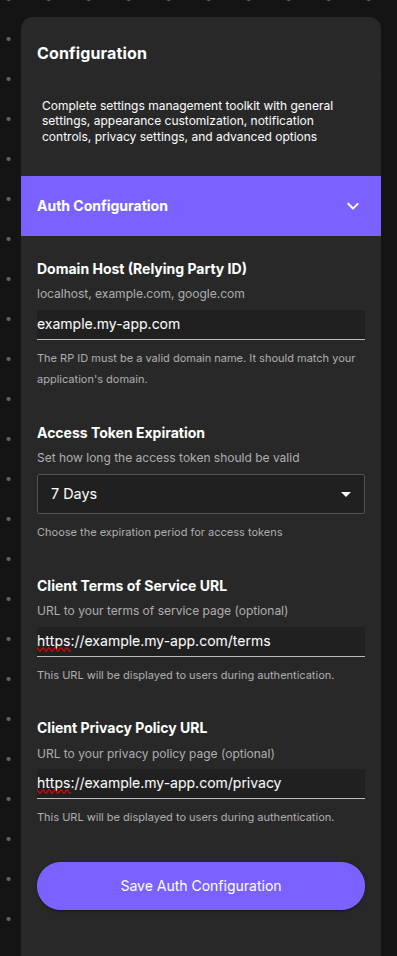
The panel shows:
- Domain Host:
example.my-app.com - Access Token Expiration:
7 Days(dropdown) - Terms of Service URL:
http://example.my-app.com/terms - Privacy Policy URL:
https://example.my-app.com/privacy
Each field includes helper text explaining its purpose.
1. Set Domain Host (RP ID)
The RP ID (Relying Party ID) determines the domain under which WebAuthn credentials are scoped.
To set RP ID:
- Locate the Domain Host (Relying Party ID) field
- Enter your domain name (no protocol, no port)
| Environment | RP ID Example |
|---|---|
| Local development | localhost |
| Production (root) | example.com |
| Production (subdomain) | app.example.com |
Rules:
- Domain name only (no
https://, no port:3000, no path) - Examples:
localhost,example.com,app.example.com
Critical: RP ID must match your application’s domain exactly. Incorrect configuration will prevent WebAuthn from working.
2. Choose Access Token Expiration
Control how long access tokens remain valid before requiring refresh.
To set token expiration:
- Locate the Access Token Expiration dropdown
- Select one of the available options
Available options:
| Duration | Recommended for |
|---|---|
| 1 Hour | High-security apps (banking, financial) |
| 7 Days | Standard web apps (default) |
| 60 Days | Mobile apps, consumer apps |
| 90 Days | Intranet, long sessions |
| 1 Year | IoT, background services |
3. Add Terms of Service URL (Optional)
To add ToS URL:
- Locate the Client Terms of Service URL field
- Enter your full URL (must include
https://) - Example:
https://example.com/terms - Leave blank if not available
Where this appears:
The link appears in the bottom-left corner of the authentication modal.
4. Add Privacy Policy URL (Optional)
To add Privacy Policy URL:
- Locate the Client Privacy Policy URL field
- Enter your full URL (must include
https://) - Example:
https://example.com/privacy - Leave blank if not available
The link appears in the authentication modal alongside the Terms of Service link.
5. Save Configuration
To save:
- Click the purple Save Auth Configuration button at the bottom
- Wait for confirmation message
- Changes take effect immediately
Unsaved Changes: Always save before leaving the panel. Changes are lost if you navigate away without saving.
What to do next?
After configuring your project:
- Get your webworker.js script
- Customize authentication UI
- Follow Integration Guide for your framework