Installation Guide
⚡ 2 min readAccess comprehensive setup instructions, webworker.js script, and TypeScript definitions.
What the Installation Guide Panel Does
Access comprehensive documentation including step-by-step passkey installation, WebAuthn integration examples, Service Worker setup, API reference, and best practices for secure implementation.
Panel features:
- View full documentation link
- Copy Project ID
- Get webworker.js script tag
- Download TypeScript definitions
The webworker.js script is required to enable authentication features in your application.
Prerequisites
- HTML file where you’ll add the script tag
- (Optional) TypeScript project for type definitions
Opening the Installation Guide Panel
- Log in to Transcodes Console
- Open your project
- Locate the Authentication Kit Cluster
- Click the document icon (📄) labeled “Installation Guide”
- The panel opens on the right side
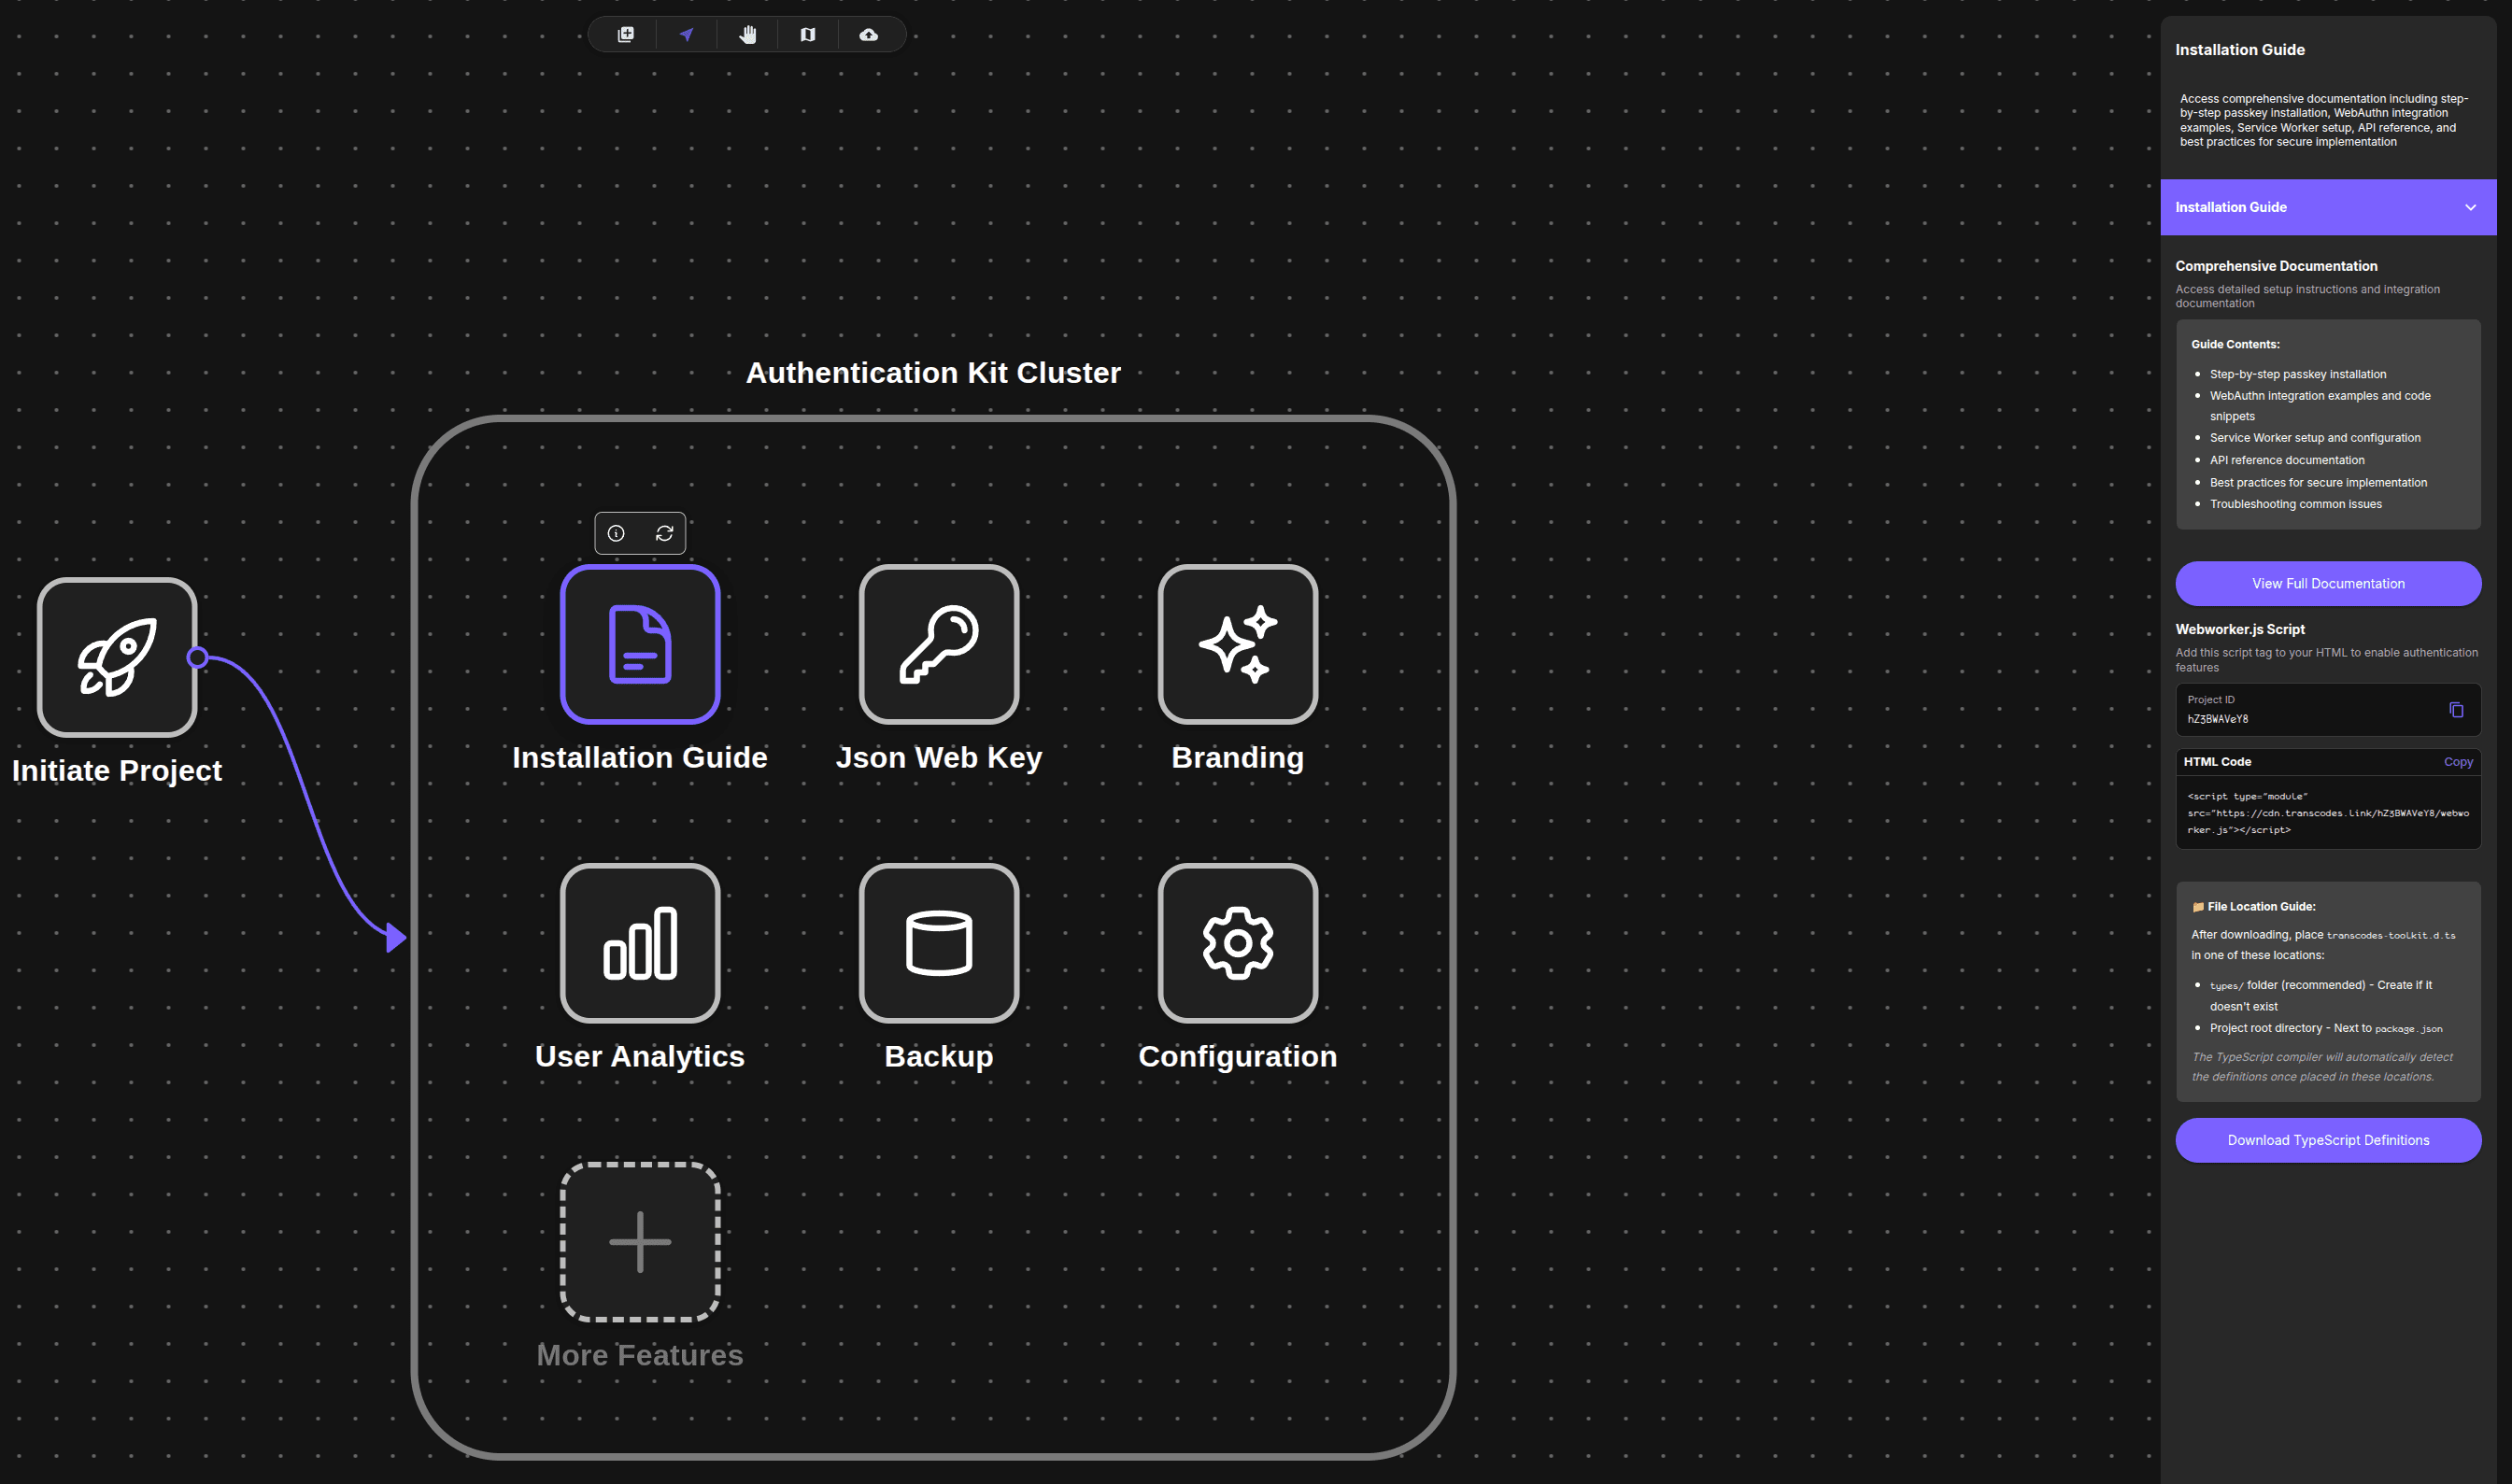
The Installation Guide panel appears on the right with a purple “Installation Guide” accordion section.
Using the Panel
The Installation Guide panel contains comprehensive documentation access and script integration tools.
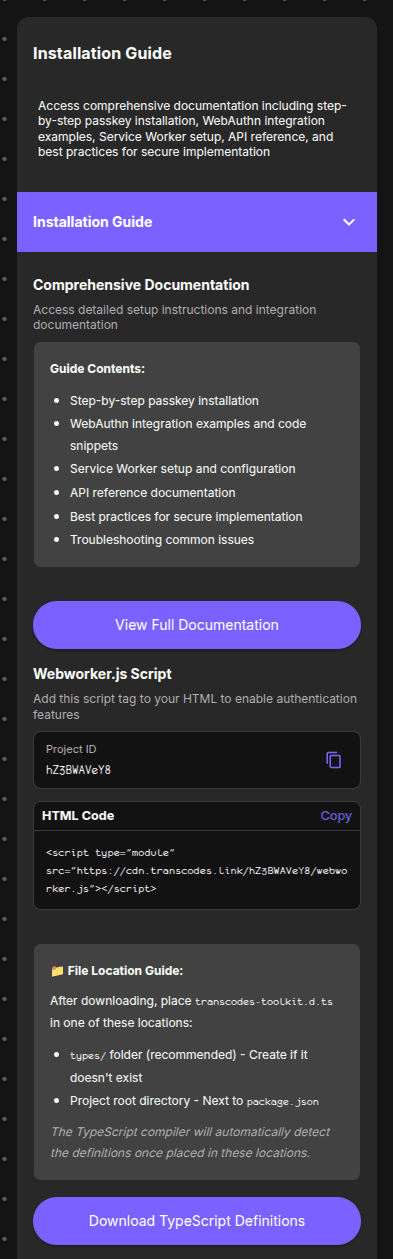
The panel shows:
- Comprehensive Documentation: Access detailed setup instructions
- Guide Contents: Step-by-step installation, WebAuthn examples, Service Worker setup, API reference, best practices, troubleshooting
- View Full Documentation button
- Webworker.js Script: Project ID and HTML code snippet
- File Location Guide: TypeScript definitions placement instructions
- Download TypeScript Definitions button
1. View Documentation
To access full documentation:
- Locate the View Full Documentation button
- Click the button to open complete integration guides
- Find detailed instructions for React, Next.js, Vue, and Vanilla JS
2. Copy Project ID
To copy your Project ID:
- Locate the Project ID section in Webworker.js Script area
- Click the copy icon next to the ID
- The ID is copied to your clipboard
Example Project ID: hZ58WAYe8
3. Add Webworker.js Script
To copy the script tag:
- Locate the HTML Code section
- Click the Copy button
- Paste the script tag in your HTML
<head>or end of<body>
Script tag format:
<script type="module"
src="https://cdn.transcodes.link/{YOUR_PROJECT_ID}/webworker.js"></script>Example:
<script type="module"
src="https://cdn.transcodes.link/hZ58WAYe8/webworker.js"></script>Important: The script uses type="module" and your unique Project ID in the URL. Always copy from the panel to ensure accuracy.
Where to add the script:
<!DOCTYPE html>
<html>
  <head>
    <title>My App</title>
    <!-- Add here (recommended) -->
    <script type="module"
    src="https://cdn.transcodes.link/hZ58WAYe8/webworker.js"></script>
  </head>
  <body>
    <div id="app"></div>
  </body>
</html>
4. Download TypeScript Definitions
To download type definitions:
- Click the Download TypeScript Definitions button at the bottom
- A file named
transcodes-toolkit.d.tsdownloads - Place the file in one of these locations:
Recommended location - types/ folder:
your-project/
├── src/
├── types/
│   └── transcodes-toolkit.d.ts
├── tsconfig.json
└── package.json
Alternative location - Project root (next to package.json):
your-project/
├── src/
├── transcodes-toolkit.d.ts
├── tsconfig.json
└── package.json
The TypeScript compiler will automatically detect the definitions once placed in these locations.
What to do next?
After adding the script:
- Configure RP ID and domain settings
- Follow the Integration Guide for your framework
- Customize your authentication UI